
Match Seams Perfectly with Fork Pins
Are you frustrated with your seams not always matching? No matter how carefully you try and match your seams, it just doesn’t always turn out! I’ve been there and can understand your frustration!
Let me introduce you to Fork Pins and how they can help you achieve perfectly matching seams every time!
Fork pins allow quilters to achieve perfectly matching seams or points every time! The pins are designed to stop seams moving during the piecing process. Essentially locking in place your pinned seams.
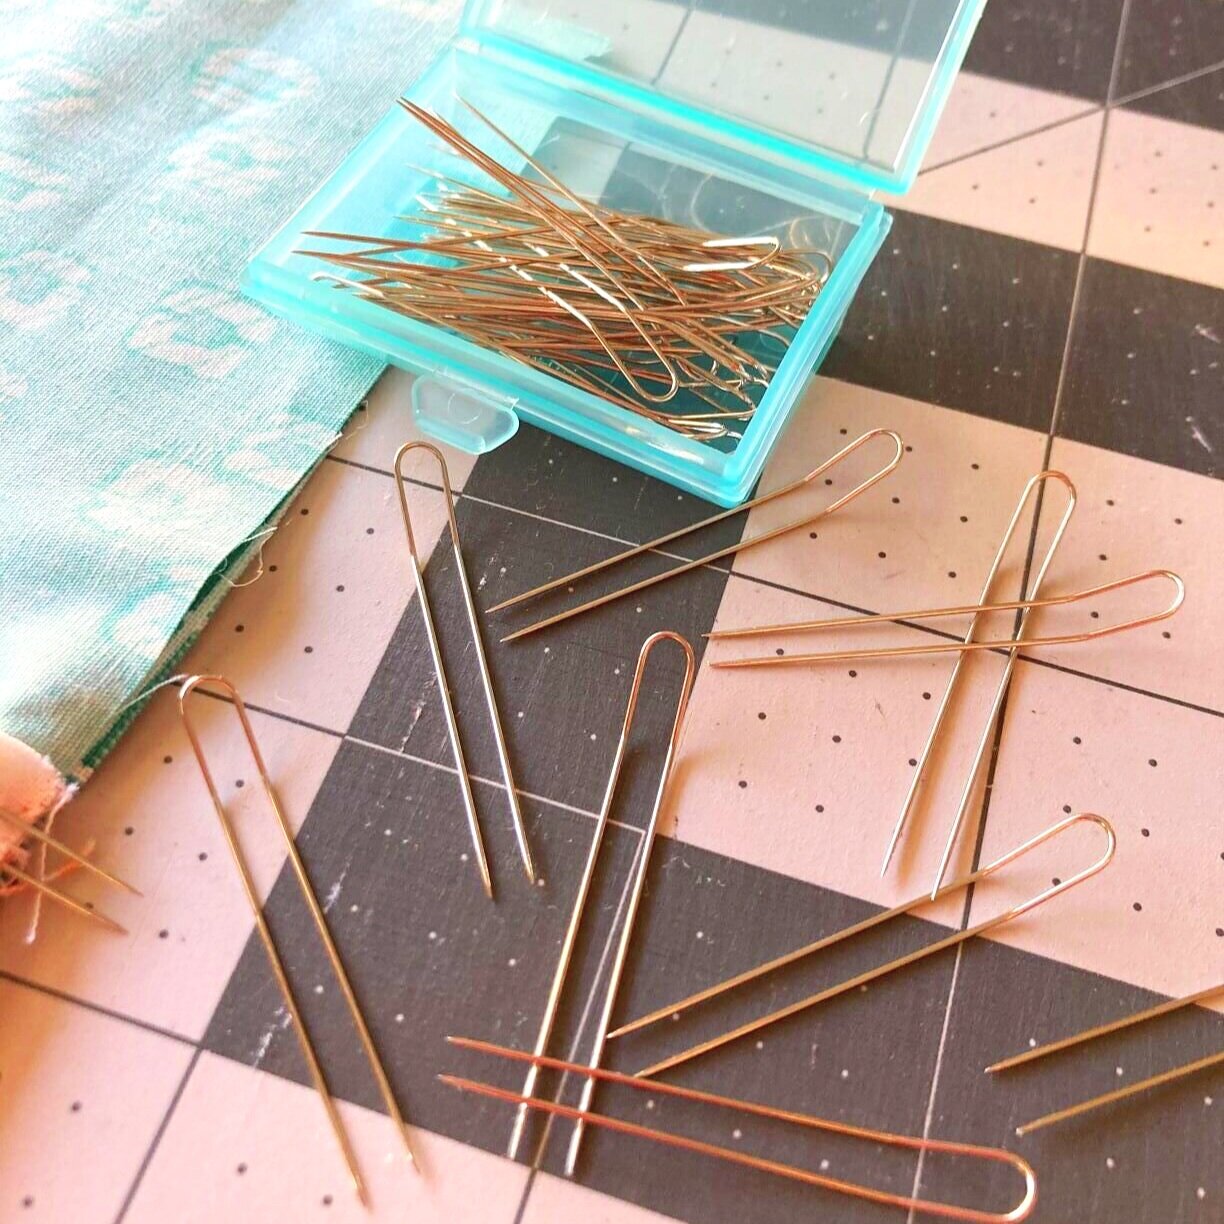
Fork pins are a sharp, fine (0.56mm), double pronged pin 40mm in length. The bent end allows you to easily handle the pin when inserting or removing from fabric.
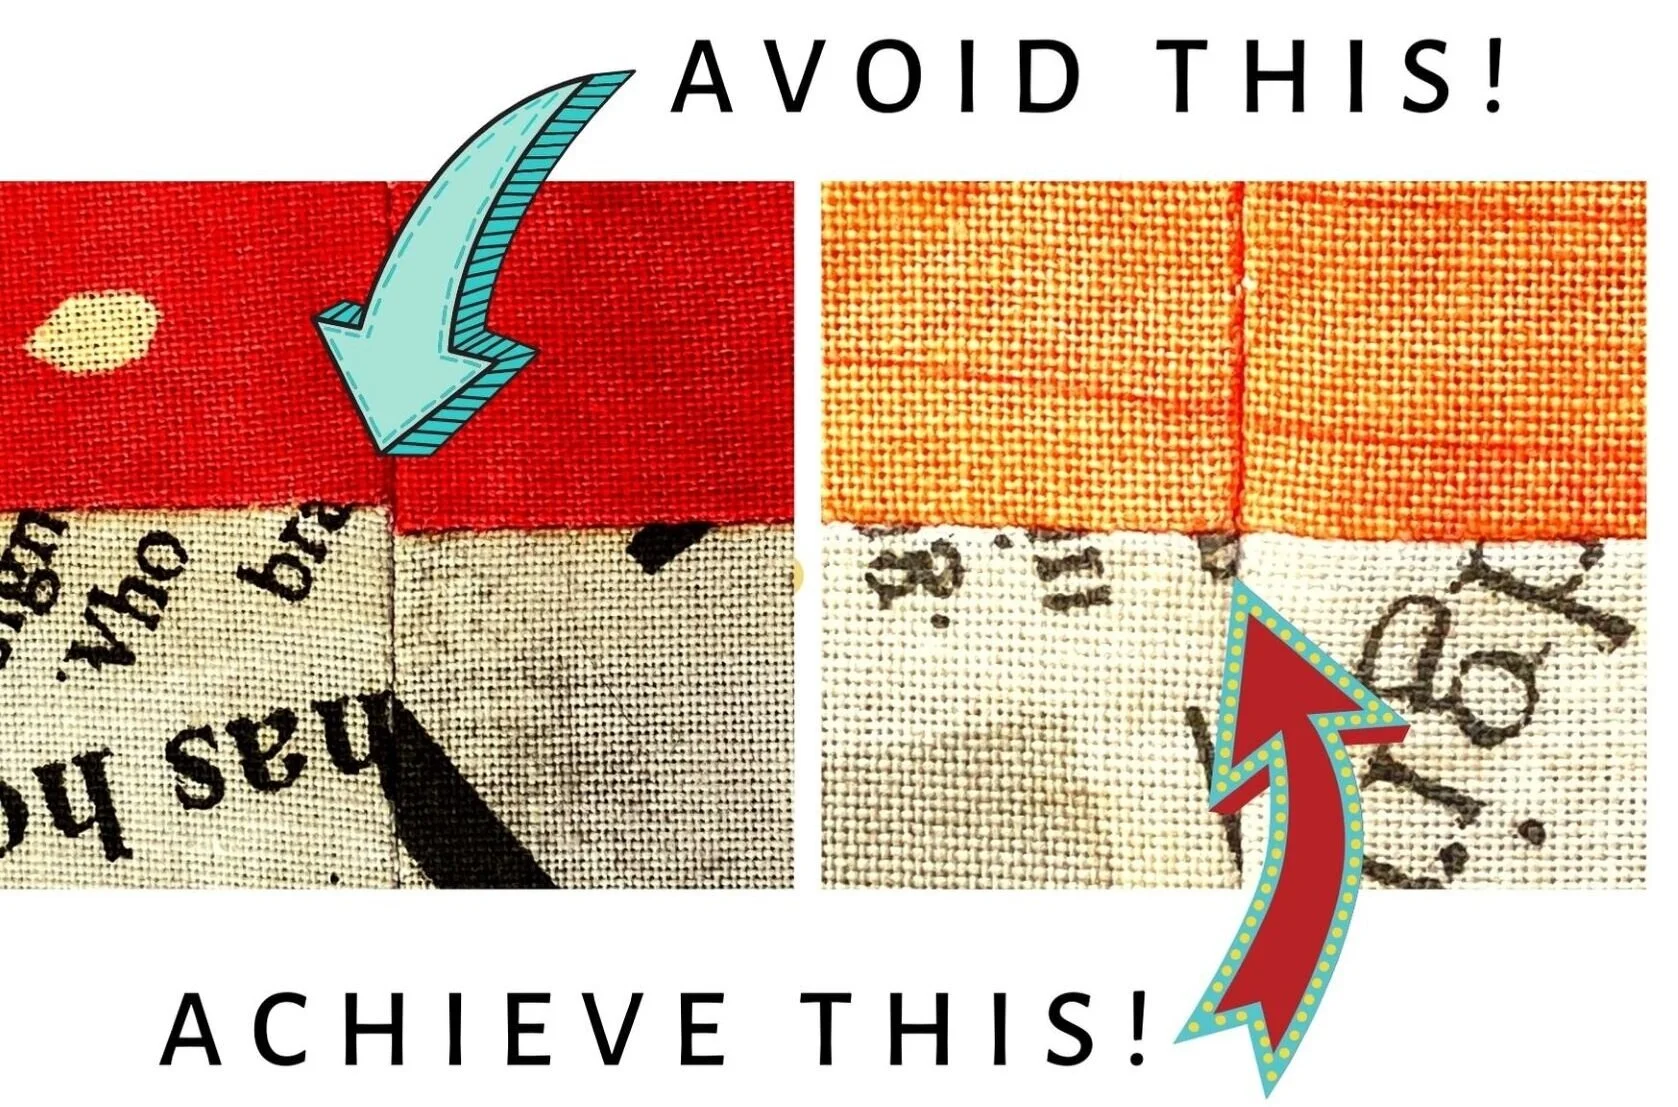
Above left is a seam I thought was lined up perfectly when using regular pins, but after sewing you can see there was some movement during the pinning and/or sewing process. So, the end result was my seams didn’t end up matching.
The photo above right shows how well my seams matched when I used my new fork pins. I did my happy dance, as finally I had found something that allowed me to achieve the results I was looking for. It wasn’t just this one time either! On all my seams where I used the fork pins, they all matched perfectly!
I will explain how to use the fork pins, so you can achieve the same fantastic results!
1.
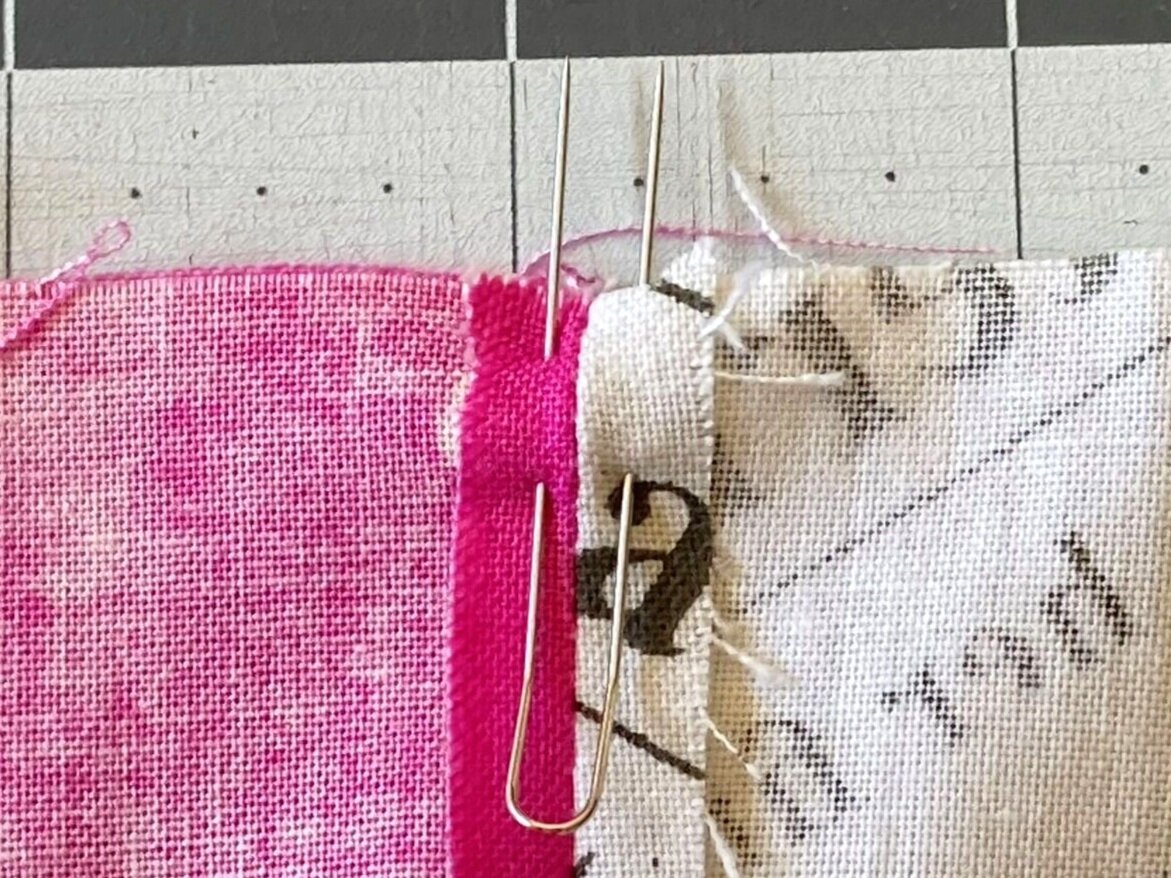
Place fork pin as pictured. For matching your open seams
or seams pressed to the side, choose one of the following methods for pinning:
For open seams - place one fork pin with each prong going on either side of the stitched seam
so it faces outwards (as pictured).
For nesting seams - use two fork pins, with the seam allowance you are matching facing in opposite directions, place a pin on either side of the stitched seam, again with pin points facing outwards.

2. Check your pinning. Turn the fabric around to the right side and check how your seams are matching. If you are happy then proceed to the next step, otherwise make any necessary adjustments.

3. Adjust the pin/s. Before you sew over the pinned seam, adjust the pin/s (if required), so that it stays within the edge of the fabric. I’m sewing with a ¼” sewing foot with a guide, so I don’t want the pin/s to get caught up in the guide!

4. S
ew over the seam.
Leave the fork pin/s in place as you sew slowly over the pin/s.
Worried about your needle breaking? Just take it slowly and there should be no issues sewing over the fork pins. To date I’ve never broken a needle and I think the benefits achieving perfectly matched seams outweigh the small chance of a needle breaking.
Tip: Keeping the fork pin in place as you sew over the seam will keep your seam from moving and staying perfectly aligned. Removing the pin will reduce your chances of achieving a perfectly matched seam!

5. Enjoy the results! Stand back and admire your work. Now you can achieve perfectly matching seams every time with fork pins.

CLOVER 240 Fork Pins, 35 Per Pack
Fork pins are a sharp, fine (0.56mm), double pronged pin 40mm in length.
The bent end allows you to easily handle the pin when inserting or removing from fabric.
Fork pins allow quilters to achieve perfectly matching seams or points every time!